An anniversary card made using the Silhouette Cameo and files from a kit by SVGcuts.com. The paper was pulled from my stash so I don’t know where it came from, other than the cardstock… More
Stuff I've made
An anniversary card made using the Silhouette Cameo and files from a kit by SVGcuts.com. The paper was pulled from my stash so I don’t know where it came from, other than the cardstock… More
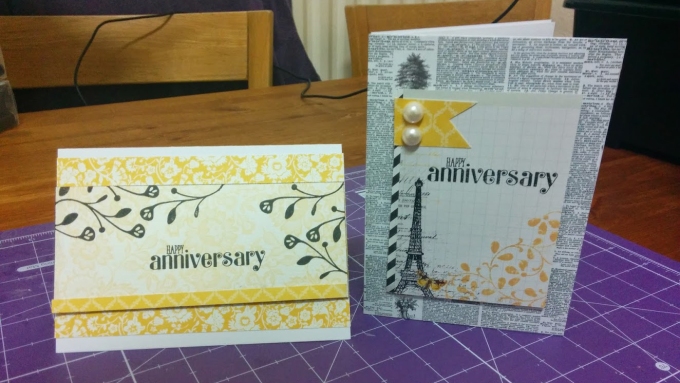
A couple of anniversary cards. I kept feeling that the card on the left ‘needed something’ so I have added some sequins since the I took the photo. I made these using Clearly Besotted stamps and… More
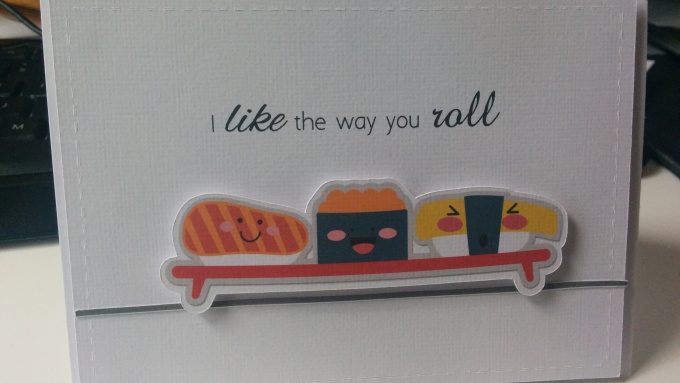
An anniversary card, made for my sushi loving husband. Our anniversary was in March, but I’m just now deciding to resurrect my poor neglected blog! The cute little sushi rolls came from Lettering Delights a… More
 Unfortunately there are times we’ll all need to send one of these cards.
I really liked the digital stamp that I used here, it’s from Pink Petticoat. It’s a very simple card, but sometimes less is more.
This is an A6 card, made from Papermill Direct cardstock. The background paper is also from Pink Petticoat, the little pearls were made with Liquid Pearls in White Opal.
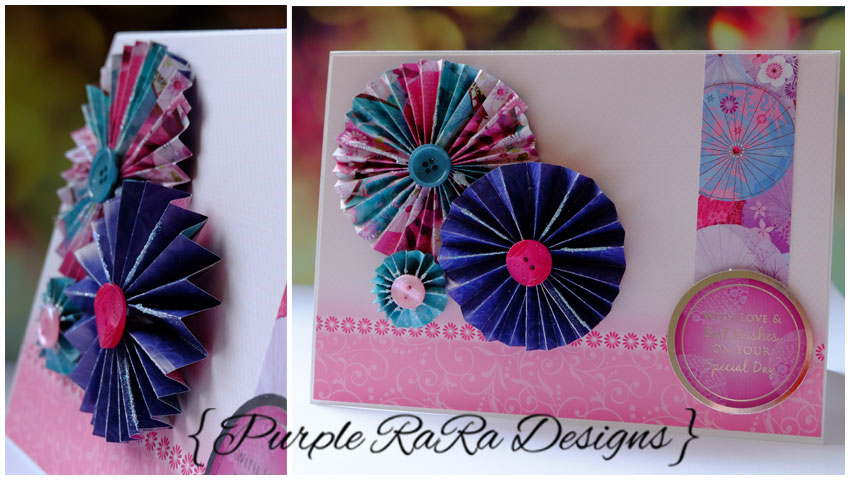 I’ve become a little obsessed with these paper rosettes lately. For some reason it took me absolutely ages to figure out how to make them. Once I had mastered it, I can’t seem to stop! You may see them pop up again and again, but I shall try to contain myself. They’re actually easy to make, once you know how! YouTube videos are great for teaching crafty skills. 🙂
This A5 card was made with the card stock from my Papermill Direct hoard. Yes, I shall refer to it as a hoard. I received a lovely free sample pack from them at the end of last year. I confess to just sitting and stroking it for a while. (Hopefully other people do this too and it’s not just me!) The selection was so lovely that I was inspired to invest in a BIG box of white card. Can you ever have too much white card?!
The patterned papers and foiled die cut are from Hunkydory Crafts. There is also some Diamond Sparkles on the rosettes. I think it’s Angel Whispers, but the label fell off the pot so I can’t be entirely sure!
And some buttons – I have a thing about buttons too!!
Oh, and this card was made without the use of my Silhouette. She needed new blades so was out of action for a while. I missed her, but I did enjoy getting the paper trimmer out again! (Don’t worry, she’s fully functioning once again!)
Thanks for visiting today!
 I’ve been really busy behind the scenes lately, and have been quite productive. Not so much with the blog though!
I’m starting out again with a very quick card. And a quick post! The thing I like most about this card is (apart from being cheerful) that it could work for just about any occasion. Any reason at all, from a “thank you” to “get well soon”, to “hi, I was thinking of you”. Or any other reason you can think of!
The card file came from Svgcuts.com It’s another one of their quick and easy files, and it really was a pleasure to work with.
The base card was from Papermilldirect.co.uk (a post on their wonderful cardstock coming soon!) The floral paper I found in a box under my desk and is by Anna Griffin, but I’m afraid have no idea if it’s still available.
 These houses were a lot of fun to make. The designs come from the Silhouette Store. I think they are called Ledge Village houses if you wish to look them up! There are more that I haven’t yet made. They are the perfect size to fit on the picture rail in my living room. And they make me smile whenever I look at them. I especially love the washing on the line.


I made them all from American Crafts cardstock. And the colours were entirely dictated by the colours I had left. I realise that trees aren’t usually purple. But I like it anyway!
 It’s no secret that I’m a big fan of the Silhouette Cameo. She’s probably my most used crafting tool. (Yes, that’s right, I said she. I’m sure she’s a sentient being!!)
Mostly I have used the Cameo for paper crafts, as pretty paper will always be my first love. However I’ve been dabbling a little with the idea of vinyl over the last few months. I finally took the plunge a little while ago and cut some vinyl. I read all kinds of tutorials about transfer tape and mirroring your design and nightmares with non-straight application. For those wishing to read or watch tutorials, YouTube is your best friend!
Although I was a little afraid at first, it was surprisingly easy. The first piece I made (shown here) was from a file at the Silhouette Online Store. I had to resize the design and mirror it (which means to flip it!). The Cameo had no problems at all cutting the vinyl. I then weeded the design (which means to remove the bits you don’t want) and used transfer tape to attach it to the back of a picture frame I had lying around. The frame is 6 x 4 inches so it’s quite small. I just added some digital patterned paper that I’d printed out and it was done. It’s small and simple but I was pleased with it! The picture shown here is from Instagram.
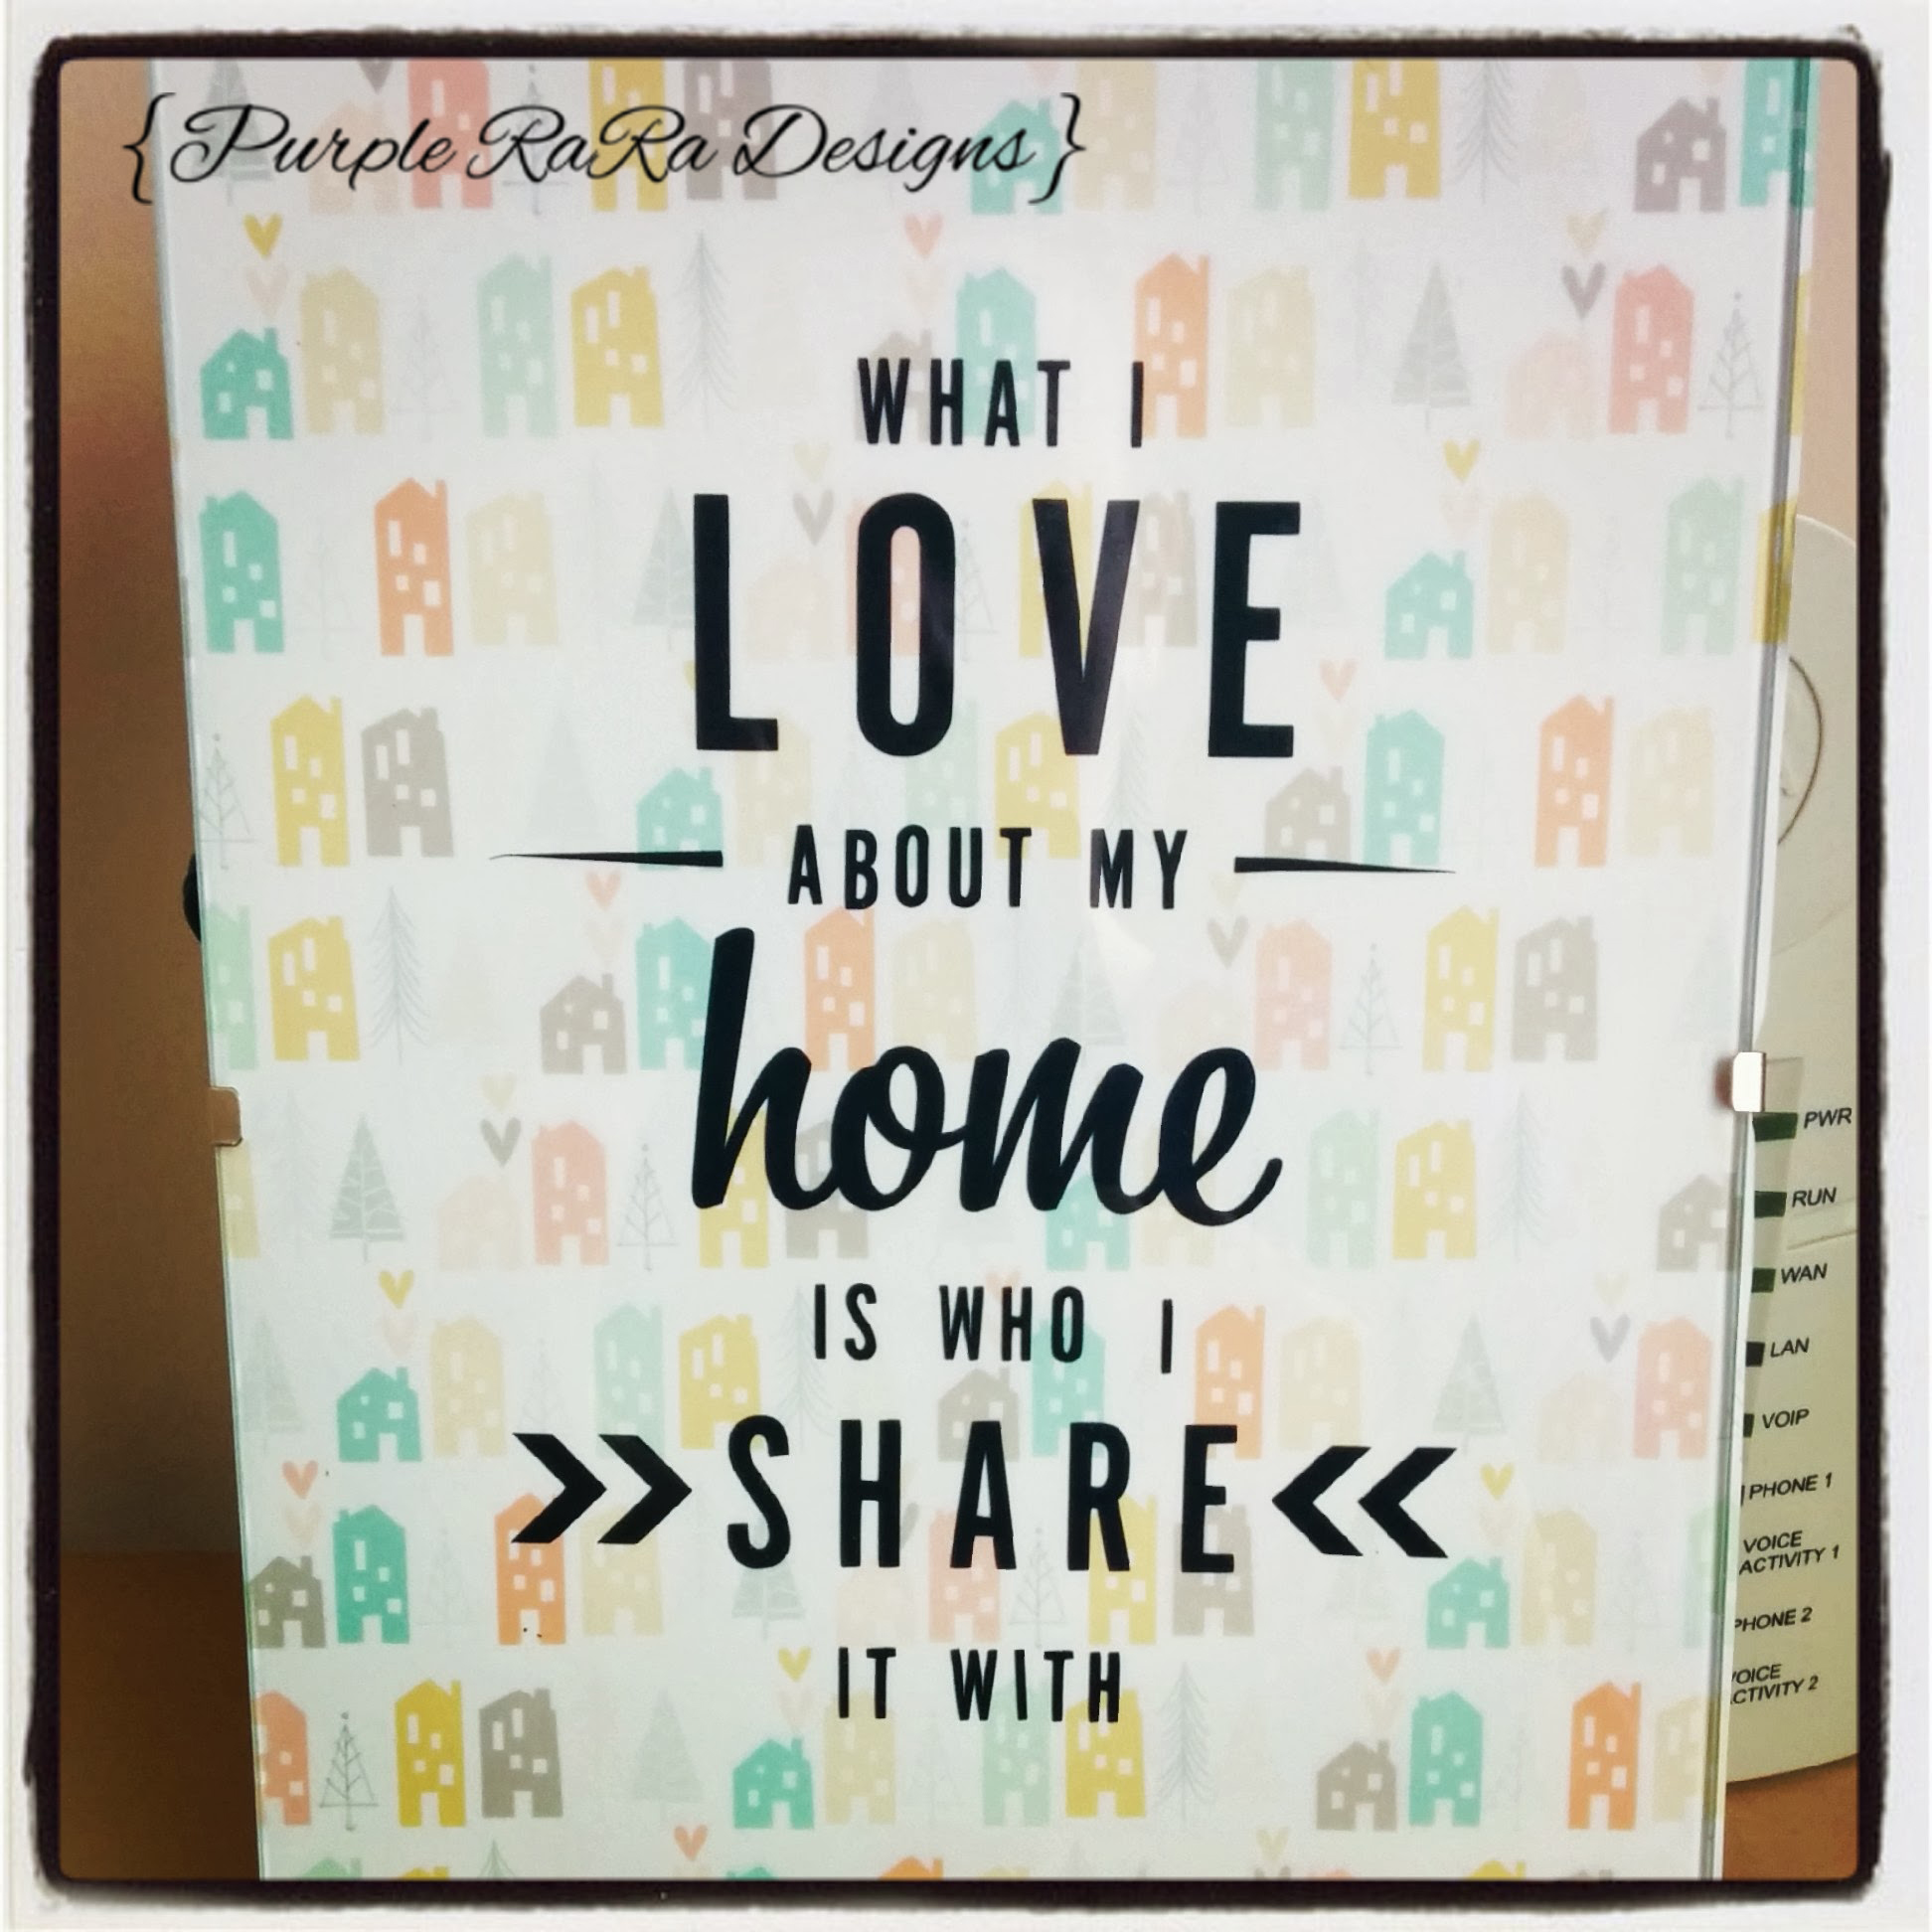
 With my second attempt with vinyl I got a little more ambitious and decided to design something myself. I think I’d probably seen the phrase on Pinterest and liked it. I have a million fonts – well nearly – so the hard part was deciding which one to use!
I also wanted to try something different so this time I used canvas as my base. This was so easy I was amazed! I gave the canvas a couple of coats of paint, and once they were dry added the vinyl. There are two different colours in my design and I attempted to line them up correctly. I’ll be honest and say that I didn’t manage it perfectly, but hopefully that will just take some practice!
This canvas is somewhat bigger than the first piece, it’s about 20 cm square (or almost 8 inches in old money!) I’m working up to a big piece for over our bed. Hopefully I’ll get round to that eventually!
 Today’s card is relatively simple. I enjoy playing with lots of pieces of paper and fighting to get things structurally sound. But sometimes it’s nice to go back to basics and just make a card that isn’t very complicated!
The background paper came from Pink Petticoat. The twine and pink mirror card from my crafty hoard. I should probably stop referring to my supplies in such a way, I’m starting to sound rather Smaug-like!
I was able to use the Print & Cut feature of my Silhouette Cameo to make the sentiment. (Doing so makes me happy. Every. Single. Time!)
Very simple card, but I was pleased with the result!
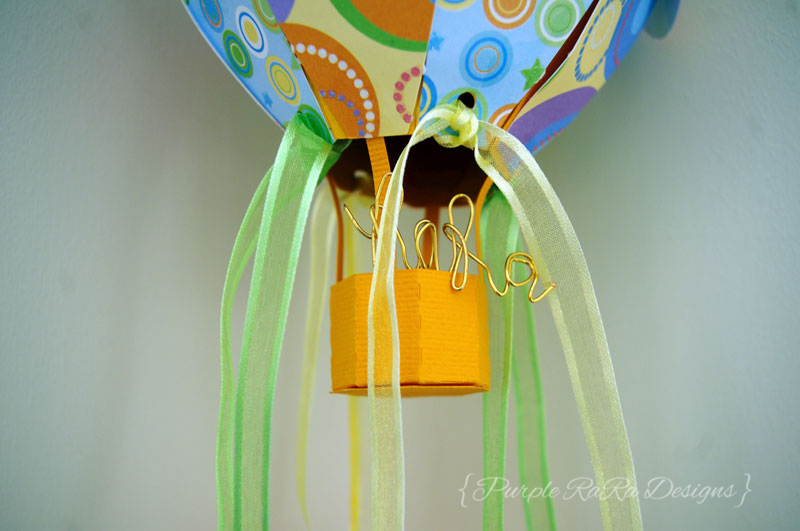
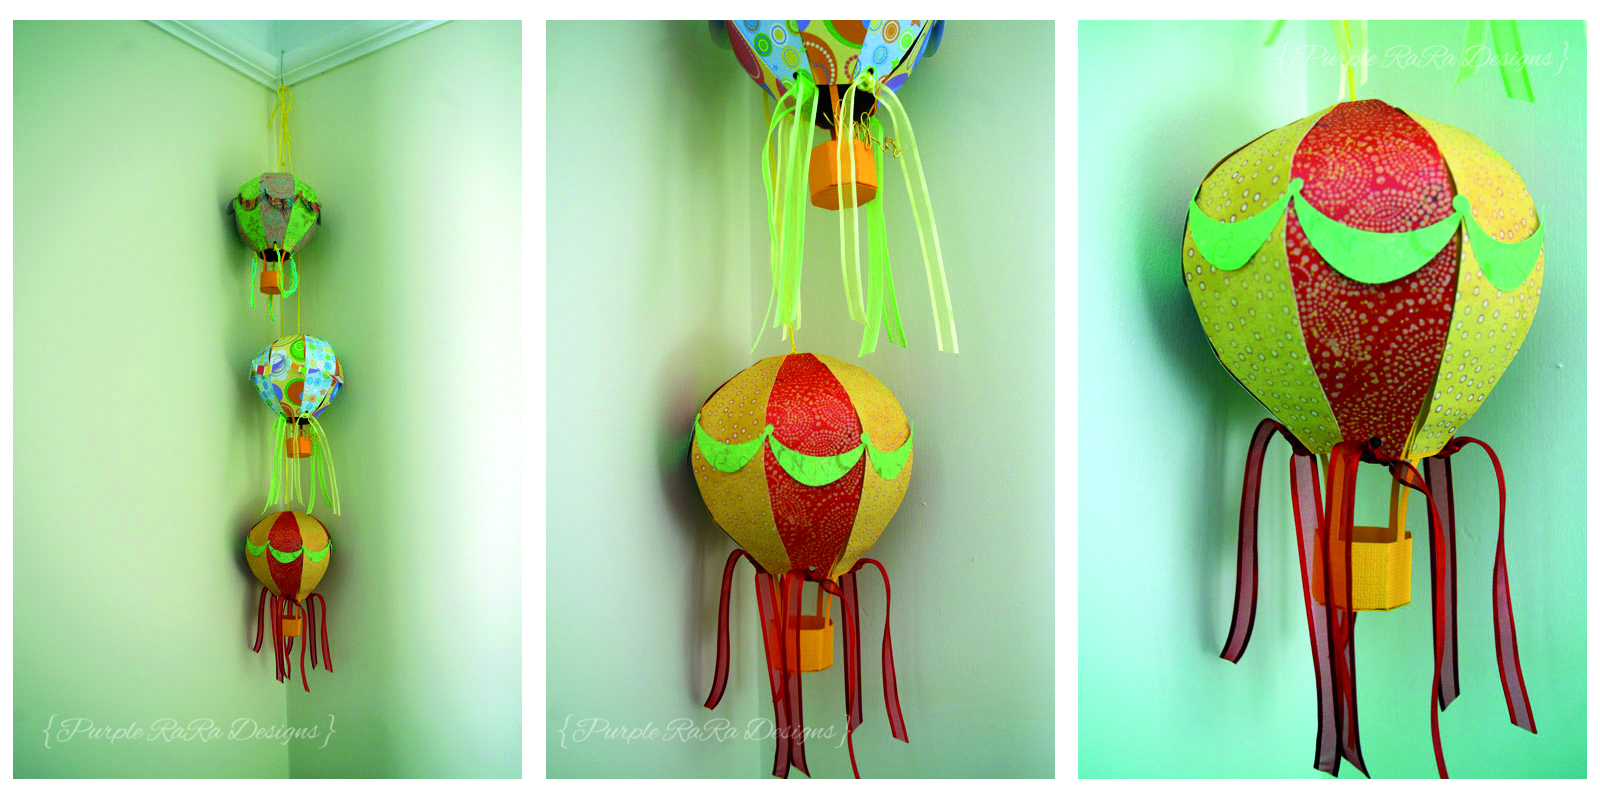 I think the hot air balloons are amongst my favourite things I’ve ever made. They’re just so cute! Every time I spot them in the corner of our living room, they make me smile. I think there should be more smiles everyone’s day!
I love that they could be made for any occasion, in any colour scheme. They’d look lovely in a child’s bedroom or a nursery. But they’d work equally well for a wedding or party. I think I might have to make another set to hang in my office. Maybe a purple set?!!
I’m repeating myself but the file was from svgcuts.com. The paper from American Crafts, Die Cuts with a View and K & Company.
There is a special and unique embellishment on the middle balloon however. My beautiful sister Lucy makes jewellery and she wrote my name (RaRa) in wire. Thanks Lucy, I love it!
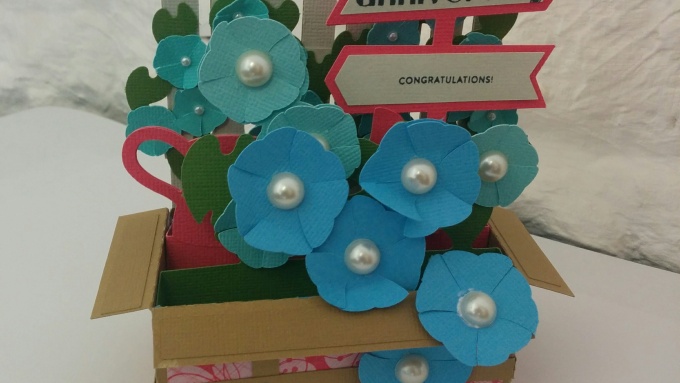
 Quick post today with a congratulations card.
Unsurprisingly it’s purple! It looks a little blue in the first two photos, but the third shows it’s purple glory. I had purple card left over from something else. I don’t plan the purple-ness, it just happens!
Almost the entire card is made from American Crafts textured card (all from the ‘Brights’ range). The patterned/glittered paper is from Die Cuts With a View. The ribbon came from my ribbon hoard – I’m afraid I don’t know where it originated! The little seed pearls came from Hobbycraft. The envelope (which the card is sitting on in the photos) is made from a piece of K and Company paper.
The file for the card itself came from svgcuts.com I think the set is called Quick and Easy.

 I have wanted a place to store my recipes for years. I’ve looked at buying index card boxes and decorating them, I’ve looked into making a book and decorating that. I’ve had all kinds of ideas.
Then I found this file at svgcuts.com And the rest was history. After years (quite literally, years) of planning and indecisiveness, this box took maybe an hour to make!
Had I given more thought to it, these aren’t the colours I would have chosen, but I was moved to make it and so used the paper my grubby little hands pulled out of the pile first. (Mostly it’s from Die Cuts with a View). I’m quite ready to call it done!
Next I went looking for a cute ‘index card’ template to print my recipes on. Couldn’t find one I liked so I made my own – you can see a peak of one in the bottom picture. I think I spent longer making the card template than I did actually making the box. Now all I have to do is type up the rest of our favourite recipes!
 I do love to play with pretty paper. Here is a prime example of that – something I made for no reason other than I felt like it!
The lamp was made using a file from www.svgcuts.com (I’m very quickly becoming addicted to their stuff!). It was cut using my trusty Silhouette Cameo, I still love this machine and use it at least a couple of times a week. I used American Crafts cardstock (it’s the best I’ve found for cutting). I think the patterned paper is by K & Company but I’ve had it so long that it’s hard to be sure!
The tiny led candle I got at a local Pound Shop. Although the paper I used for the panels is quite thin, the light doesn’t really show up as well as I’d like. So next time I’ll use vellum for the panels. I also think I’d weigh down the next one with some beans or rice. Just to help it stand up straight!
